
Dear Analyst #79: How to finally AutoFit column widths in Excel for the Mac (and PC)
Podcast: Play in new window | Download
Subscribe: Spotify | TuneIn | RSS
When you’re creating some dashboard or report, one of the most common formatting operations you’ll find yourself doing is expanding the column width to fit the text or numbers in a cell. You might also be expanding the row height to fit the size of the text, but I think it’s less common than expanding the column width. In concert with the shortcut to select the entire column (CTRL+SPACE), AutoFitting the column width is a super powerful shortcut to show the data that you need. The problem? The shortcut only applies to Windows Excel users. For whatever reason, Microsoft decided not to give a native shortcut for AutoFitting columns in Mac Excel. Until now. Well not really until now, but this is the workaround for all you Mac Excel users who want to AutoFit columns like a boss.

Video tutorial for this episode:
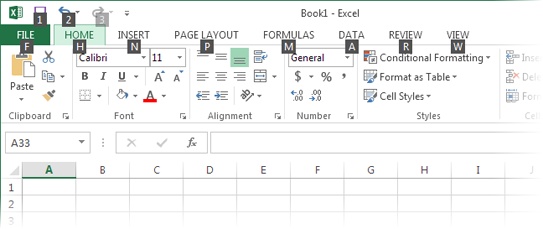
AutoFit columns in Excel for Windows keyboard shortcut
As a quick refresher, the keyboard shortcut for AutoFitting columns for Excel on Windows is pretty simple:
ALT, O, C, A or ALT, H, O, I
This is a “sequential” keyboard shortcut where you hit each key one at a time. ALT, O, C, A actually comes from Excel 2003 and ALT, H, O, I is the more modern shortcut. When you press these keys, you’ll see the ribbon light up in Windows Excel:
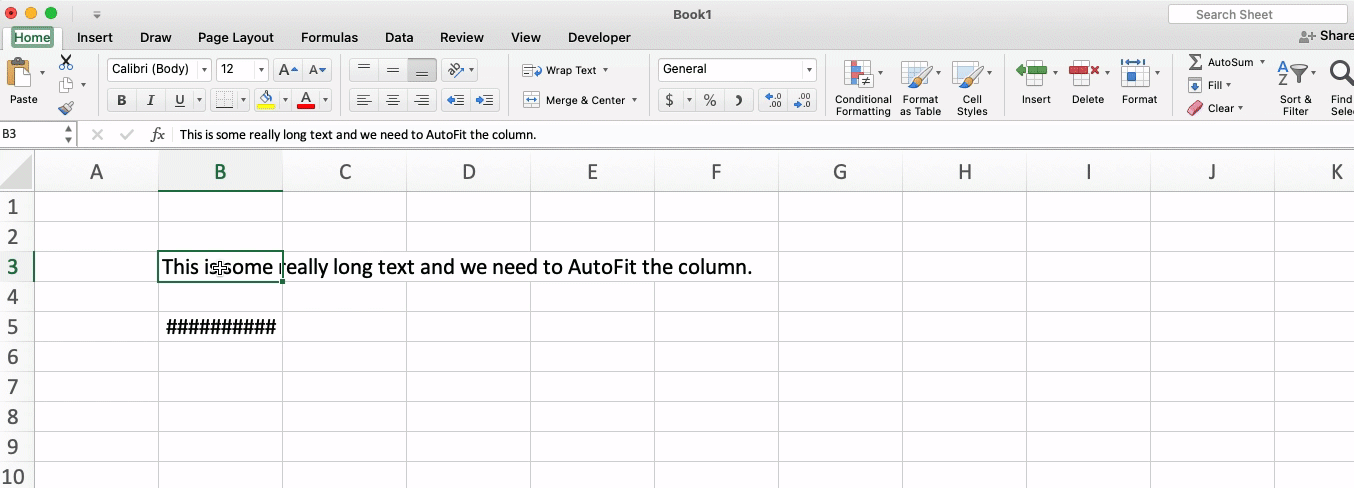
This makes learning shortcuts on Windows Excel pretty easy because you can just press letters to open up menus and buttons on the ribbon. The AutoFit columns shortcut automatically expands the column to fit whatever you’ve selected in the column. This means you don’t have to drag-and-drop the column anymore like this:

AutoFit columns in Excel on Mac keyboard shortcut
Mac Excel users have probably come to learn (and hate) that you can’t use keyboard shortcuts in the ribbon. I don’t think Microsoft just overlooked this feature for Mac Excel users. Rather, it’s a limitation of the Mac OS in general. So what can Mac Excel users do to AutoFit columns? There are a few solutions/workarounds:
Method 1: Open the ribbon with F6 and TAB keys (worst method)
There is a way to open the ribbon in Mac Excel and that’s with the F6 key. The big caveat is is you don’t have function keys turned on in your Mac OS settings, then you’ll have to press the function key and the F6 key. So the shortcut for most folks is FN+F6. Once you press the F6 key, you’ll see the green highlight show up over the “Home” option on the ribbon. You may have to press F6 a few times until the green selection goes over the “Home” tab. Once the “Home” tab is highlighted, you can press SPACE to get into the “Home” tab:

Once the Home tab is open, the goal is to get to the Format button button near the right of the ribbon because that’s where the AutoFit Column Width option is located:

How do you get there? From what I know the only way is to hit the TAB key several times. As you hit the TAB key, you’ll see the green selection go through every option in the Home tab. You would think that you could do SHIFT+TAB to cycle backwards (start from the end of the ribbon) since the Format button is near the end of the ribbon. No dice. You literally have to hit TAB up until the green highlight hits the Format button:
Heaven forbid you hit TAB too many times and you end up shooting past the Format button. This means you have to cycle through all the options on the Home tab again to get to the Format button.
This method is obviously not ideal since it requires so many key presses to get to the right menu. The good news is that if you happen to need to use the ribbon, F6 opens it up and if the button in the tab is one of the “early” buttons near the left of the ribbon, maybe hitting the TAB key a few times isn’t too onerous. It’s still pretty clunky because when you press F6 the green selection might land on the Quick Access Toolbar or in the active cell form box first. This means you have to hit F6 a few times just to get to the right tab in the ribbon. Again, not ideal.
Method 2: Access toolbar with CTRL+F2 and go through Format menu
One of the biggest confusions I have about Excel in general is the need for the ribbon plus the toolbar. There are many duplicates between the two which just means more confusion for the users. Nonetheless, you can access the toolbar by pressing CTRL+F2 (if you don’t have function keys turned on, you’ll have to press CTRL+FN+F2). When you apply this shortcut, you’ll notice a slight gray highlight over the main apple icon in the top-left of the toolbar:
This shortcut is the same thing as if you hovered your cursor over the Apple icon. From here, you can either start typing “Fo” to get to the Format menu or just start using the arrow keys to get to the Format menu. I prefer to use the arrow keys and SPACE to access the “AutoFit Selection” option in the Format menu. The full sequence of shortcuts looks like this:
CTRL+F2to highlight Apple iconRIGHT ARROW6 times to get the Format menu highlightedSPACEorDOWN ARROW4 times to get the Column menu highlighted within the Format menuSPACEorRIGHT ARROWonce to get into the Column menuDOWN ARROWonce to get to the AutoFit Selection optionENTERto apply the AutoFit Selection operation
This is what this all looks like in Excel:

Still quite a few keystrokes to get to the AutoFit operation, but much better than method 1. Now you know you can at least get to any menu in the toolbar with CTRL+F2 and access the menu with a combination of the arrow keys and SPACE.
Method 3: Use App Shortcut in Mac OS keyboard settings
This method is pretty good but the reason I don’t think it’s the best method is because it requires you to use Mac OS settings versus Excel settings. On Mac OS, click on System Preferences->Keyboard->Shortcuts tab, and you’ll get a menu that looks like this:

You can set application-specific shortcuts to any application on your mac. After you click on the App Shortcuts option on the left side (last option), click on the plus sign to add a new app shortcut:

Scroll through all the applications until you get to Microsoft Excel. The tricky thing about the “Menu Title” field is you have to type out the operation in Excel word-for-word and it’s case-sensitive. In this box, you have to type out “AutoFit Selection.” Unfortunately Mac isn’t smart enough to get all the potential menu options to autofill here, so just watch your spelling. After that, you just need to type in the shortcut you want to use for this option. I would use something with the letter “A” in it so that you remember it’s AutoFit. Something like SHIFT+COMMAND+A could work:

Back in Excel, you now have the super simple COMMAND+SHIFT+A shortcut to expand the column width!

Method 4: Using Mac Excel’s Customize Keyboard menu (recommended)
This method and method 3 are pretty much the same thing. You’ll still use the COMMAND+SHIFT+A shortcut to AutoFit columns. The main difference is that you use Mac Excel’s native settings for defining keyboard shortcuts instead of your general Mac OS settings. I don’t like messing with my Mac OS settings too much since, well, it applies to everything you do on your Mac. If you have a bunch of keyboard shortcuts in the App Shortcuts settings for your Mac OS, it may become difficult to find the one you want to delete or edit. With Mac’s native keyboard shortcut settings, this hopefully won’t be an issue.
The Customize Keyboard menu is one of the under-utilized menus in Mac Excel. It allows you to set a keyboard shortcut to any operation in Excel. Forget not being able to use the ribbon, just set your own shortcuts here. First step is to click on Tools in the toolbar (not the ribbon) an then Customize Keyboard to get this menu:

Remember how the Format button is on the Home tab? After you click on the Home tab selection, just start searching for “AutoFit” in the Commands section and you’ll see a few options pop up:

There is an inconsistency between the name of the operation “AutoFit Selection” and what is actually in the Home tab->Format menu (“AutoFit Column Width”). In any event, “AutoFit Selection” is the right option, and you just need to type in the new shortcut where it says “Press new keyboard shortcut” and then click “Add.” Again, I like SHIFT+COMMAND+A for my AutoFit column width shortcut:

Now you can use COMMAND+SHIFT+A (just like method 3) to AutoFit your columns. The nice thing here is that your custom keyboard shortcuts are stored in your Excel settings versus your Mac OS settings.
Other Podcasts & Blog Posts
In the 2nd half of the episode, I talk about some episodes and blogs from other people I found interesting:
- This Week In Startups #1268: Robinhood earnings breakdown, Amazon launching department stores + Mark Suster deep dives VC
- The Changelog #455: Building software for yourself


Excellent, thanks very much!
You’re welcome!